



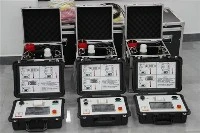
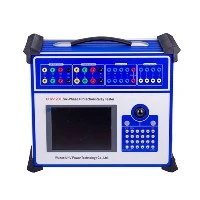
Using a VLF Test Kit immediately after a long period of storage can pose safety hazards and risks of damaging the equipment.Before use, the following inspection and handling steps must be followed. It is recommended that these operations be performed by qualified electrical testing personnel.

Phase One: Visual and Environmental Inspection (Power Off)
1.Storage Environment Assessment:
Temperature & Humidity: Check if the equipment was stored in a dry, well-ventilated, non-corrosive environment. If the environment was humid, internal condensation may have occurred, reducing insulation performance and creating a high risk of short circuits when powered on.
Pests/Foreign Objects: Check vents, ports, and interfaces for spider webs, insect nests, or other debris.
2.External Structure Check:
Chassis & Panel: Check the chassis for obvious deformation or damage. Ensure the display screen, buttons, and knobs are intact.
Grounding Terminal: Check that the grounding terminal is secure and free of rust. This is the primary safety guarantee!
Cables & Interfaces:
Inspect power cords, high-voltage output cables, and connecting cables for damage, aging, or cracking.
Check all plugs and sockets (especially high-voltage ends) for cleanliness, oxidation, or deformation.
Phase Two: Preliminary Internal Inspection (Operate with Caution)
Note: Skip this step if you lack electrical knowledge or are not authorized to open the device. Proceed directly to Phase Three with extreme caution.
Open the Chassis: Disconnect all power sources and open the side panel.
Visual Inspection:
Dust & Moisture: Gently remove dust from components like the mainboard, transformer, and high-voltage capacitors using a soft brush or compressed air (cold air only). If significant moisture is found, dry the unit slowly from a distance using a hairdryer on a low heat setting or allow it to dry naturally in a ventilated area for 24 hours or more.
Components: Look for signs of burnt, bulging (especially electrolytic capacitors), leaking, or corroded components.
Wiring: Check internal connections for looseness, detachment, or damage (e.g., from rodents).
Phase Three: Preliminary Power-On and Functional Test (No-Load/Light-Load)
After completing the above checks and confirming everything is normal, you can proceed with the power-on test.
1.Correct Connection:
Ensure the device's power switch is in the "OFF" position.
Connect a secure and reliable protective earth ground.
Temporarily do not connect any high-voltage output cables (No-Load Test).
2.Low-Voltage Power-On Test:
Connect the power cord and turn the instrument's power switch on.
Observe: Listen for any abnormal sounds (like cracking, arcing) and smell for any burning odor.
Check Display: See if the display lights up normally and if all indicator lights are correct. Note any error messages during self-test (if equipped).
Functional Test: Without starting high-voltage output, test menu navigation, parameter setting (e.g., voltage, frequency, time), and other functions.
3.No-Load High-Voltage Test (Critical Step):
Connect the high-voltage output terminal to the measurement divider (but leave the other end disconnected from any test object).
Set a very low voltage value (e.g., 1 kV or 1%-5% of the rated voltage) and a very short test time (e.g., 1 minute).
Start the test and monitor closely:
Whether the voltage ramp-up is smooth and if the displayed voltage is accurate and stable.
Any abnormal sounds or smells from the equipment.
Listen for slight "hissing" discharge sounds (which could indicate internal moisture).
If the low-voltage, no-load test is normal, gradually increase the test duration and slightly raise the voltage (e.g., 5 kV, 10 kV...), observing stability at each step.
Phase Four: Load Testing and Calibration
1.Connect a Standard Test Object:
Use a known-good load with small capacitance (e.g., a standard high-voltage capacitor) for a load test.
Start from a low voltage and gradually increase, observing if the load capacity is normal and if the output voltage is stable.
2.Check Calibration Expiry Date:
VLF high-voltage generators are measuring instruments; their output voltage and frequency accuracy require regular calibration.
Check the device's calibration label. If the calibration has been expired for a long time, it is recommended to contact the manufacturer or a metrology unit for recalibration to ensure test data accuracy.